Remodeling your kitchen is an exciting project that can completely change your house. However, they also produce mountains of waste and debris, which can easily become too much to handle. Understanding how to properly handle construction debris will save you time, money, and headaches, whether you’re a contractor overseeing several projects or a homeowner doing a do-it-yourself renovation.
Why Kitchen Remodel Debris Management Matters
Typically, one to three tons of garbage are produced during kitchen renovations. This covers everything, including broken tiles, drywall, flooring, and outdated countertops and cabinets. Poor debris management can cause safety risks, impede project progress, and potentially result in code infractions.
Your workspace gets cluttered when debris builds up without a clear plan. The project schedule gets pushed back, workers can trip over materials, and tools can get buried under rubbish. For homeowners, this means spending more time in disorder than is necessary.
Understanding What You’re Dealing With
It’s helpful to know what kinds of materials you’ll be dealing with during a kitchen remodel before you begin tearing out cabinets.
Common Kitchen Demolition Materials
- Old cabinets and shelving units
- Countertops (laminate, granite, marble, or quartz)
- Appliances (refrigerators, stoves, dishwashers)
- Flooring materials (tile, hardwood, vinyl, or linoleum)
- Drywall and plaster
- Lighting fixtures and electrical components
- Plumbing fixtures and pipes
- Windows and doors
- Insulation materials
A portion of these materials can be donated or repurposed. Others require specific attention. Planning your debris removal strategy can be easier if you are aware of the differences.
Creating Your Debris Management Plan
Start by estimating the type and volume of materials you expect to remove, whether it’s drywall, concrete, roofing, or general construction waste. Then decide how the debris will be handled on-site, including dumpster placement, recycling options, and a clear schedule for pickups to keep the job site safe and organized. The best time to plan for debris removal is before you start demolition. Here’s how to create a solid plan.
Step 1: Assess the Scope
Make a list of everything you plan to remove as you go through your kitchen. Measure big things like appliances and cabinetry. Calculate how much debris you’ll produce. This helps you figure out how many dump runs or what size dumpster you’ll need.
Step 2: Identify Recyclable and Reusable Items
Not everything needs to go to the landfill. Many kitchen materials have value or can be recycled.
Items You Can Often Recycle or Donate:
- Working appliances (refrigerators, stoves, microwaves)
- Solid wood cabinets in good condition
- Cabinet hardware and hinges
- Lighting fixtures
- Tile and stone materials
- Metal components (copper pipes, steel fixtures)
- Glass items
Organizations like Habitat for Humanity ReStore accept donations of usable building materials. You can get a tax deduction while helping someone else. It’s a win-win situation.
Step 3: Choose Your Disposal Method
You have several options for getting rid of construction debris. Taking the time to choose the right removal method can save you money, prevent delays, and keep your job site safe and organized.
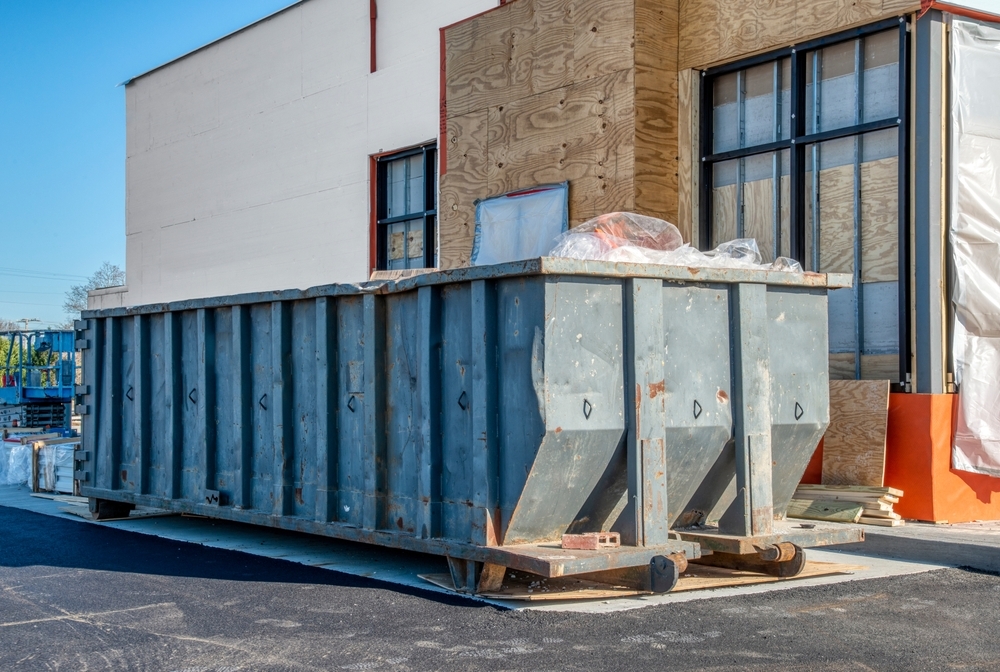
Dumpster Rental
For kitchen remodels, we often recommend renting one of our roll-off dumpsters. We deliver the container directly to your driveway or approved street location, place it carefully to protect your property, and give you the time you need to fill it at your own pace. When the job is finished, simply let us know, and we’ll promptly haul it away, making cleanup one less thing you have to worry about.
Dumpster sizes typically range from 10 to 30 cubic yards. For most kitchen remodels, a 10 or 15-yard dumpster works well. If you’re doing extensive structural work or combining multiple rooms, you might need a 20-yard container. Convenience and flexibility are two advantages of renting a dumpster. Without having to worry about being removed right away, you may work at your own pace.
Junk Removal Services
We provide the truck and the hauling, while you handle the loading. Our team arrives on-site to collect your pre-loaded debris, ensuring a fast and professional removal process. Businesses searching for commercial junk removal near Suwanee can also count on our team for fast, professional debris hauling perfect for office cleanouts, renovations, and property upgrades.
This option is ideal if you have limited space for a roll-off dumpster or need debris removed quickly. Pricing depends on the volume and type of material, with total costs varying based on the scope of your kitchen remodel.
Safety First: Protecting Yourself and Your Property
Debris from construction is more than simply a problem. It might be harmful. Everyone working on the project is protected when appropriate safety measures are used.
Personal Protective Equipment
Always wear appropriate safety gear during demolition and debris handling:
- Heavy-duty work gloves to protect against sharp edges
- Safety glasses or goggles to shield your eyes from dust and flying particles
- Dust masks or respirators when dealing with drywall or old insulation
- Steel-toed boots to protect your feet from falling objects
- Long pants and long sleeves to prevent cuts and scrapes
Protecting Your Home
If you’re planning a remodel and scheduling a dumpster rental near Forsyth County, GA, setting up a protected pathway from your kitchen to the container can help prevent unnecessary damage while hauling debris outside. Debris removal can damage floors, walls, and doorways if you’re not careful.
Use thick cardboard or plywood sheets to make a passage from your kitchen to the exit. This shields your floors from dents and scrapes. To stop dust from spreading throughout your house, cover adjacent rooms with plastic sheeting.
If you’re transporting big objects through small spaces, remove the door frames or install edge protection. Repair expenditures of hundreds of dollars can be avoided with a few minutes of preparation.
Watch Out for Hazards
Older kitchens may contain hazardous materials that require special handling:
In homes constructed prior to 1980, asbestos was often used in ceiling materials, insulation, and floor tiles. Stop working right away if you think you may have asbestos, and have a qualified expert test and remove it. Dangerous fibers may be released into the air by disturbed asbestos.
Another issue with older homes is lead paint. Toxic dust is produced when lead paint is used to sand or demolish surfaces. If you’re performing a lot of work, think about hiring a professional lead abatement company.
Beyond material hazards, it’s just as important to take basic safety precautions before you start tearing anything out. Always turn off electricity and water to the kitchen before starting demolition. Hitting a live wire or active water line can cause serious injury or property damage.
Organizing Your Workspace for Efficient Debris Removal
A well-organized job site makes debris removal faster and easier. Here’s how contractors and smart homeowners set up for success.
Create Designated Zones
Set up different areas for different types of materials:
- A recycling zone for metal, wood, and other recyclable materials
- A donation pile for items in good condition
- A trash area for genuine waste
- A staging area for materials you’re keeping or reusing
This organization speeds up sorting and makes it easier to maximize recycling and donations.
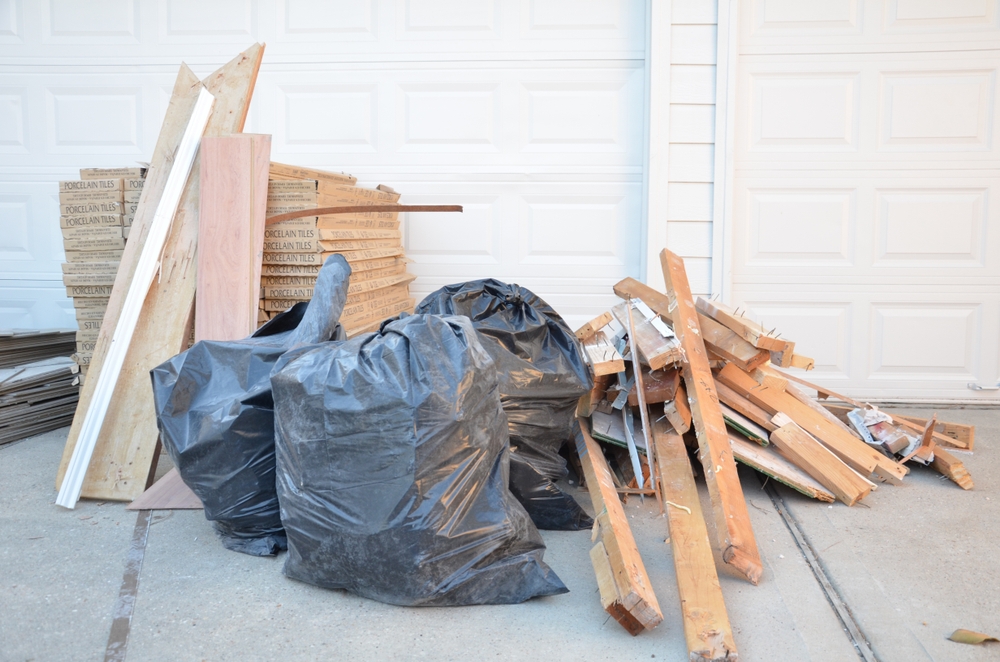
Use the Right Containers
Don’t just pile everything in one spot. Use separate containers or tarps for different material types. This prevents mixing and makes sorting easier later.
Heavy-duty contractor bags work well for smaller debris like tile pieces, drywall chunks, and insulation. Use sturdy boxes or bins for hardware, fixtures, and small metal items you plan to recycle.
Clear Debris Daily
The biggest mistake many people make is letting debris accumulate. At the end of each work day, remove or consolidate debris. This keeps your workspace safe and accessible.
For contractors managing crews, assign specific workers to debris management. Making it someone’s clear responsibility prevents it from being overlooked. If you’ve scheduled a dumpster rental in Milton, clearing debris into the container at the end of each day keeps your project organized and your work area safer for everyone involved.
Working with Your Contractor (For Homeowners)
If you’ve hired a contractor for your kitchen remodel, debris removal should be part of the contract. Here’s what to discuss upfront.
Clarify Responsibilities
Who handles debris removal? Some contractors include it in their quote. Others expect homeowners to arrange their own disposal. Get this in writing before work begins. Clear communication prevents surprises and disputes later.
Ask these questions:
- What does debris removal include in your bid?
- How often will debris be removed from the site?
- Are there any materials I need to handle separately?
- What happens to recyclable or reusable items?
- Is the cost of dumpster rental or dump fees included?
Understand the Timeline
Find out when the trash will be taken out. Although it could be more expensive, daily removal keeps the site tidy. At significant project milestones or once a week, some contractors would rather remove debris.
Be prepared so that temporary debris mounds won’t surprise you. Additionally, be aware of how this impacts your home’s usability while construction is underway.
For Contractors: Best Practices for Debris Management
Effective debris management sets competent contractors apart from amateurs. Effective debris management increases client satisfaction, expedites projects, and improves construction site safety.
Build Debris Costs Into Your Bids
Never assume debris removal is free or negligible. Calculate realistic costs based on:
- Expected volume of debris
- Dumpster rental or hauling fees
- Labor time for sorting and loading
- Recycling or disposal fees
- Fuel costs for hauling
Underestimating these costs eats into your profit margins. Factor in 10 to 15 percent of total project costs for debris management on kitchen remodels.
Maintain a Clean Job Site
Contractors are often evaluated by clients based on how tidy the job site is. A disorganized, trash-filled webpage gives off an amateurish vibe and raises questions about its quality.
Plan to remove debris on a regular basis. Keep the paths free. At the conclusion of each day, sweep up. Clients are strongly influenced by these simple initiatives. For larger renovation projects, renting a 20 yard dumpster near Alpharetta can make it much easier to keep debris contained and your job site organized from start to finish.
Know Your Local Regulations
Rules regarding construction debris vary by community. For dumpsters to be put on public roads, some require licenses. Others limit how some materials can be disposed of.
Check local laws before beginning any initiatives. Project delays and fines may follow violations. To find out about specific restrictions while working in new areas, give the county or city building department a call.
Maximizing Recycling and Minimizing Waste
Sending less to the landfill is good for the environment and can save you money. Many recycling programs are free or cost less than landfill disposal.
Metal Recycling
Kitchens contain lots of recyclable metal. Copper pipes, steel fixtures, aluminum ductwork, and stainless steel appliances all have value. Many scrap metal facilities will pay you for these materials.
Separate ferrous (magnetic) metals from non-ferrous metals. Non-ferrous metals like copper, brass, and aluminum fetch higher prices.
Wood Recycling
Solid wood cabinets and trim can often be donated or sold. Even damaged wood has value. Some facilities grind it into mulch or use it for biomass fuel.
Remove nails and hardware before recycling wood. This makes it more acceptable to recycling facilities and increases its value.
Drywall Recycling
Some areas have drywall recycling programs. Recycled drywall gets turned into new drywall or used as a soil amendment in agriculture.
Keep drywall separate from other debris and avoid getting it wet. Contaminated or wet drywall usually can’t be recycled.
Concrete and Masonry
Concrete countertops, tile, and stone can be crushed and reused as aggregate for new concrete or as base material for driveways and paths. Many landfills have special areas for concrete recycling at reduced rates.
Common Mistakes to Avoid
Learning from others’ mistakes saves you trouble. Here are pitfalls to watch out for.
- Underestimating Volume: People consistently underestimate how much debris a kitchen remodel creates. When in doubt, rent a larger dumpster or plan for extra dump runs. Running out of space mid-project creates chaos.
- Mixing Hazardous Materials: Don’t mix paint, solvents, batteries, or other hazardous materials with regular construction debris. These require special disposal and can contaminate entire loads, leading to rejection at the landfill and additional fees.
- Ignoring Weight Limits: Dumpsters have weight limits. Exceeding them results in overage fees. Heavy materials like concrete, tile, and stone add up quickly. If you’re removing lots of heavy materials, ask about weight allowances when renting.
- Blocking Access: Place dumpsters where they won’t block driveways, sidewalks, or street access. Make sure the container can easily be picked up when full. Poor placement can lead to pickup problems and extended rental fees.
- Skipping Permits: Some municipalities require permits for dumpsters on public streets or even on private property. Failing to get the required permits can result in fines. Check local requirements before ordering your dumpster.
Wrapping Up Your Kitchen Remodel Debris Management
Managing construction debris doesn’t have to be the worst part of your kitchen remodel. With proper planning, the right disposal method, and good organization, you can keep your project running smoothly.
Remember to prioritize safety, maximize recycling when possible, and keep your workspace clean. Whether you’re a homeowner tackling a DIY project or a contractor managing client expectations, good debris management makes everything easier.
Take the time upfront to create a solid plan. Your future self will thank you when you’re enjoying your beautiful new kitchen instead of dealing with piles of debris. Ready to simplify your kitchen remodel cleanup? Contact Speedy Dumps, Inc. today to schedule reliable dumpster delivery and keep your project moving without the mess.